-
Note: this section discusses all sections of the exhibition, except tile sets. For guidance on using tile sets, see the Using Tile Sets tab on this guide.
Put the exhibition in editing mode, and click the + Page Component button. You will see that there are two options: + Page Component (top) and + Page Component (bottom). Both work in exactly the same fashion, but when your exhibition reaches a certain length, it can be useful to add components directly to the bottom, rather than having to reorganise the work each time.
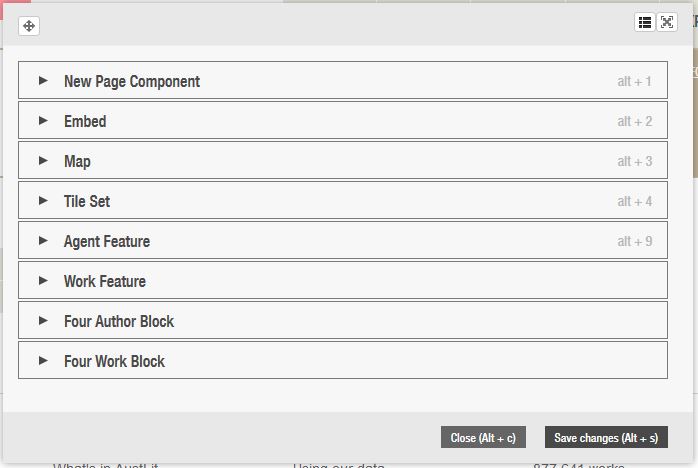
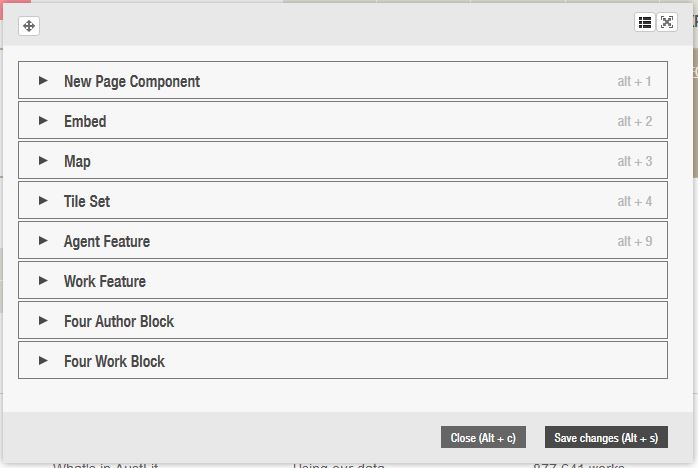
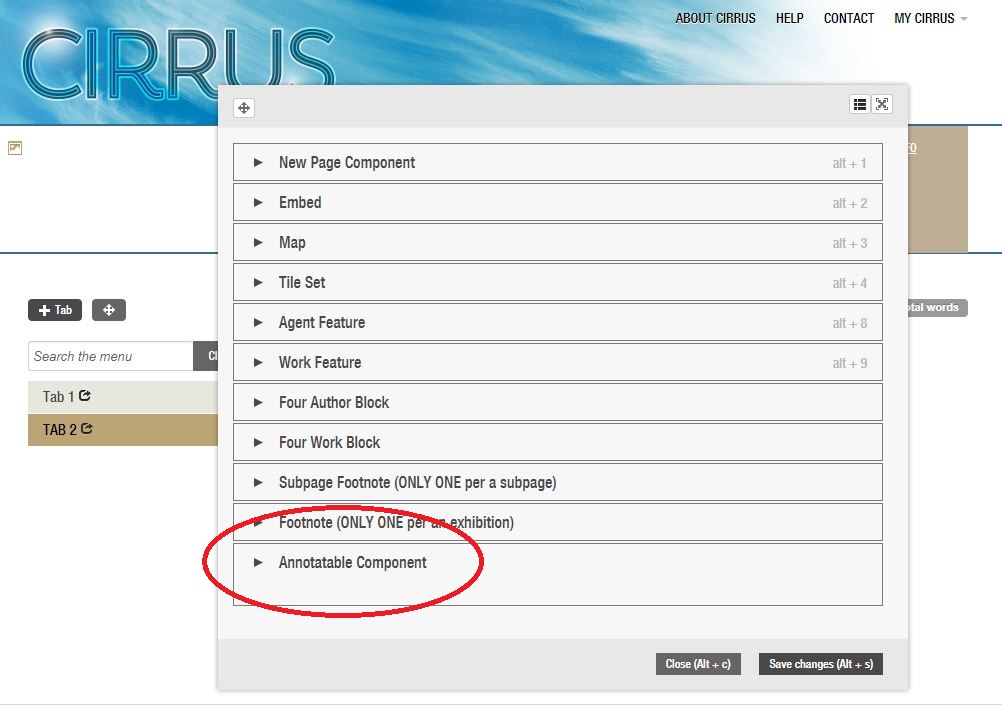
Click on the + Page Component button to bring up the following pop-up window:
-
Every aspect of the exhibition is added from this pop-up window: it is simply a matter of choosing the feature that best suits your purposes.
Exhibitions are built on a combination of the following eight options:
- New Page Component: the basic building block of the exhibitions, this section is where you add text and images.
- Embed: where you add audio-visual material to an exhibition.
- Map: allows you to embed interactive maps in your exhibition.
- Agent Feature: draws on AustLit records for authors and organisations, and embeds them in your exhibition.
- Work Feature: as with Agent Feature, but drawing on AustLit records for works.
- Four Author Block: draws content on authors from the AustLit database, but without the text component of the Agent Feature.
- Four Work Block: as with the Four Author block, but drawing on AustLit records for works.
- Tile Set: adds interactive tiles to your exhibition, allowing you to include work lists and slideshows.
Which options you use depends on the purpose and audience of your exhibition. We recommend that you consider the best options to make your exhibition engaging, interactive, and informative.
Navigate directly to the section of the guide that you need using the left-hand menu.
-
Text and images (which are likely to form the core of your exhibition) are added in very similar fashion to one another.
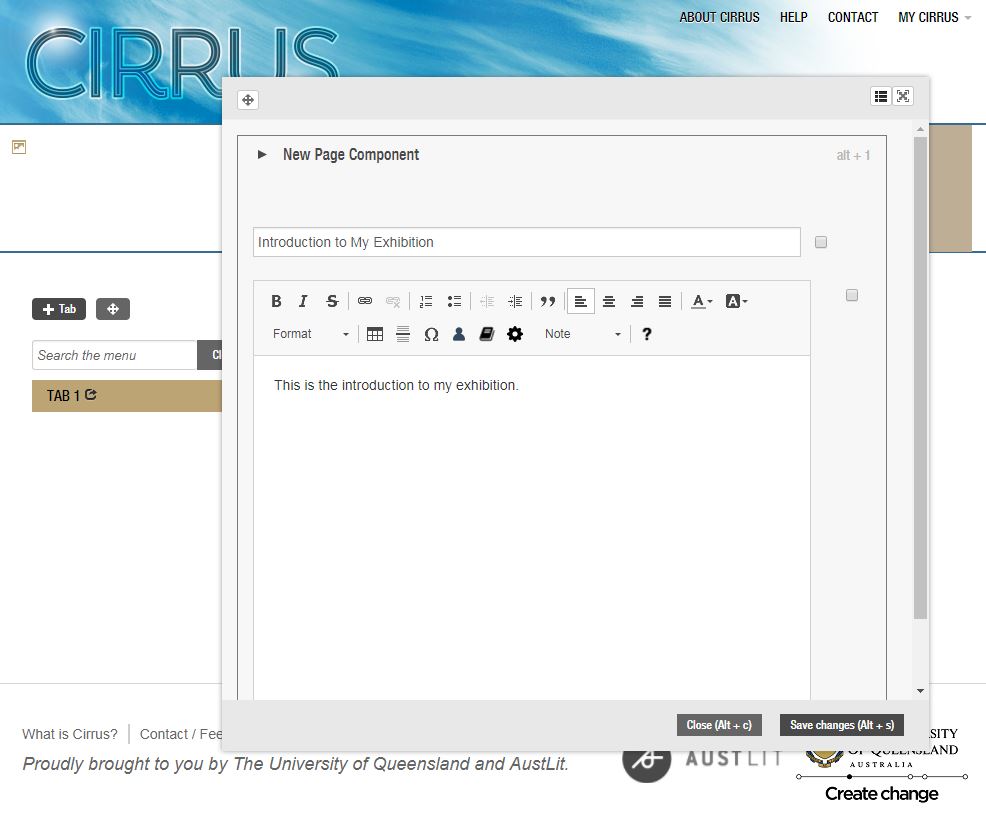
Click the + Page Component button, and select New Page Component. You will be asked to add a title or text. While you do not need to include both title and text, you will have to add either title or text. (And you can, of course, add both.)
-
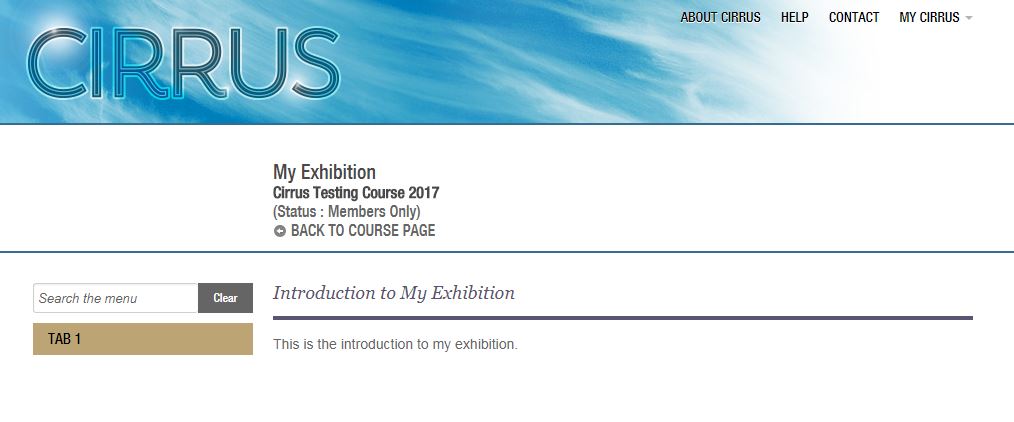
Click 'Save', and your new text field will be added to your exhibition:
-
To edit your text, put your work in editing mode, and double-click on the text field.
You can also format your text while it is in editing mode, using the buttons that appear along the top of the text box. From top to bottom, they perform the following functions.
If you are uncertain about any of the options, hover over each of the buttons to see what they do.
-
The process for adding images is similar to the process for adding text, but with one additional step.
Before uploading images, please note:
- Images that you wish to add to your exhibition are stored on your computer / USB drive before uploading. You cannot upload images directly from external websites.
- Images are in either JPEG or PNG format.
- Images will display at a width of 700 pixels (dpi). Larger images can be uploaded, but the system can struggle with files that are extremely large, so you may wish to re-size your images before uploading them.
To upload an image, click on + Page Component and select 'New Page Component' from the pop-up window.
- Add your title.
- Add your text.
The text and title the way in which you'll identify and cite your records. We recommend using the title as a description and putting the full citation in the text field, but the actual arrangement will be your choice.
Click Save.
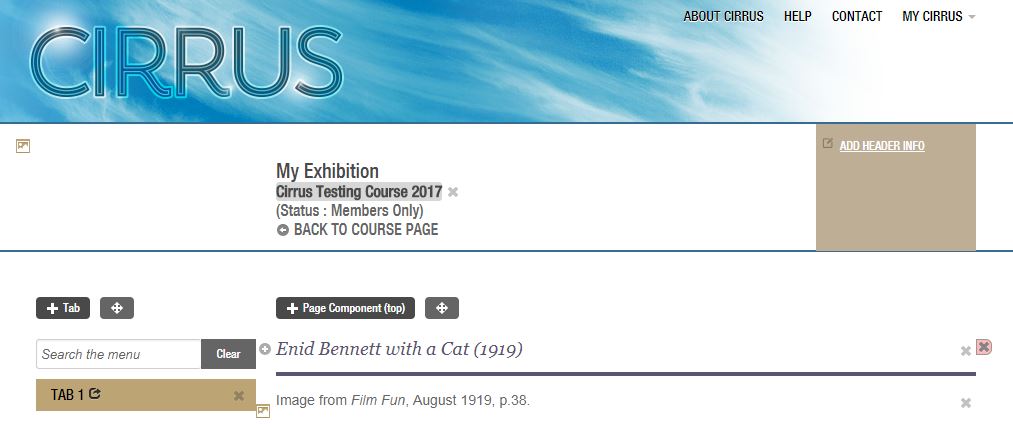
The exhibition will now show your title and text, as well as a small image icon to the left of the text box:
-
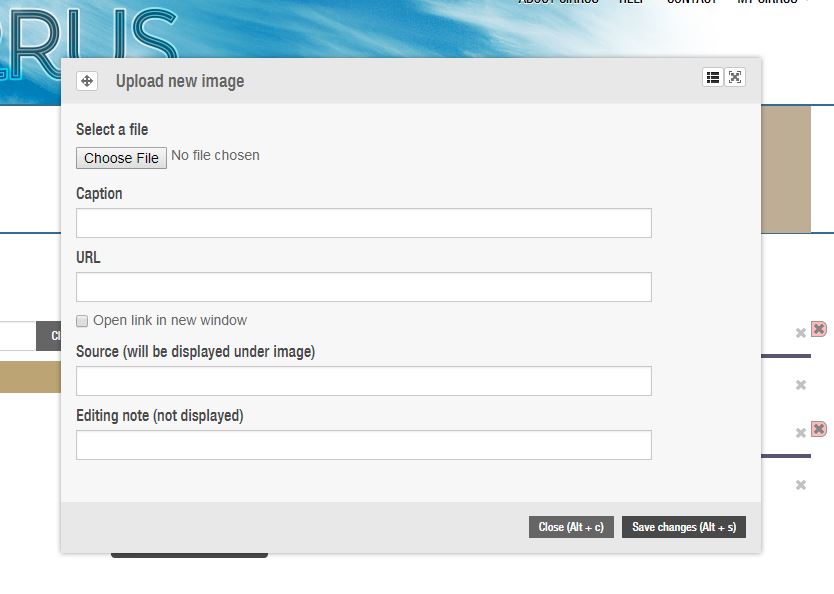
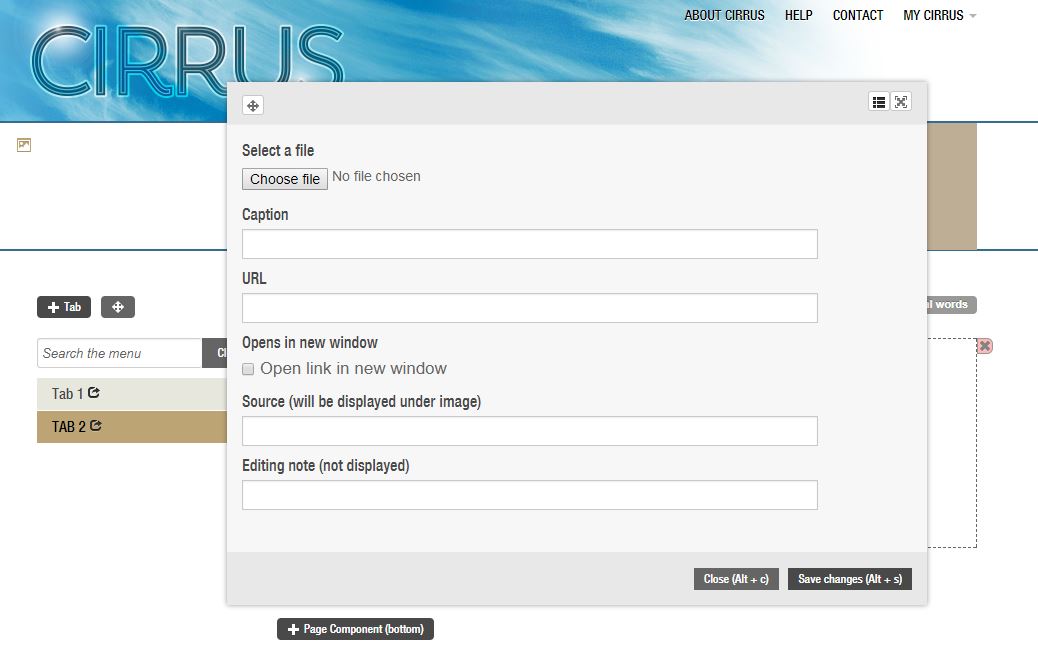
Click the image icon to upload your image. It will bring up the following pop-up window:
-
Click 'Choose File' and select the image you wish to upload from your collection of images.
You have the option to add either a caption or a source: captions appear in 'hover text' (which pops up as you 'hover' the cursor over the image), whereas sources are displayed below the image. If you have already added the source in the step above, you do not need to add either of these.
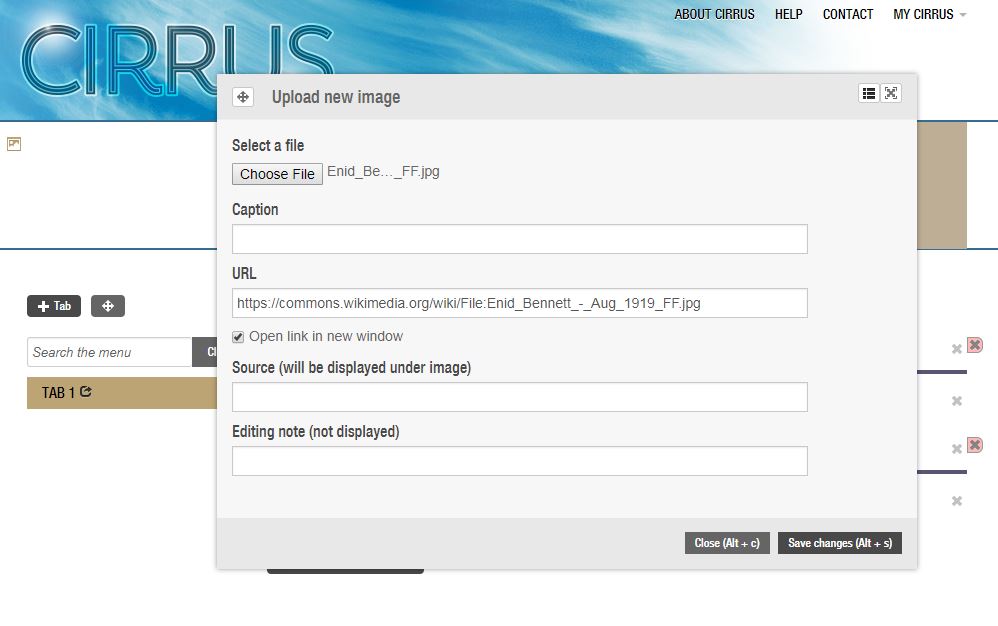
If your image comes from an external website, you can add the website's URL. This will enable readers to click through the source page. We recommend ticking the 'Open link in new window' box.
Your pop-up window should look like this:
-
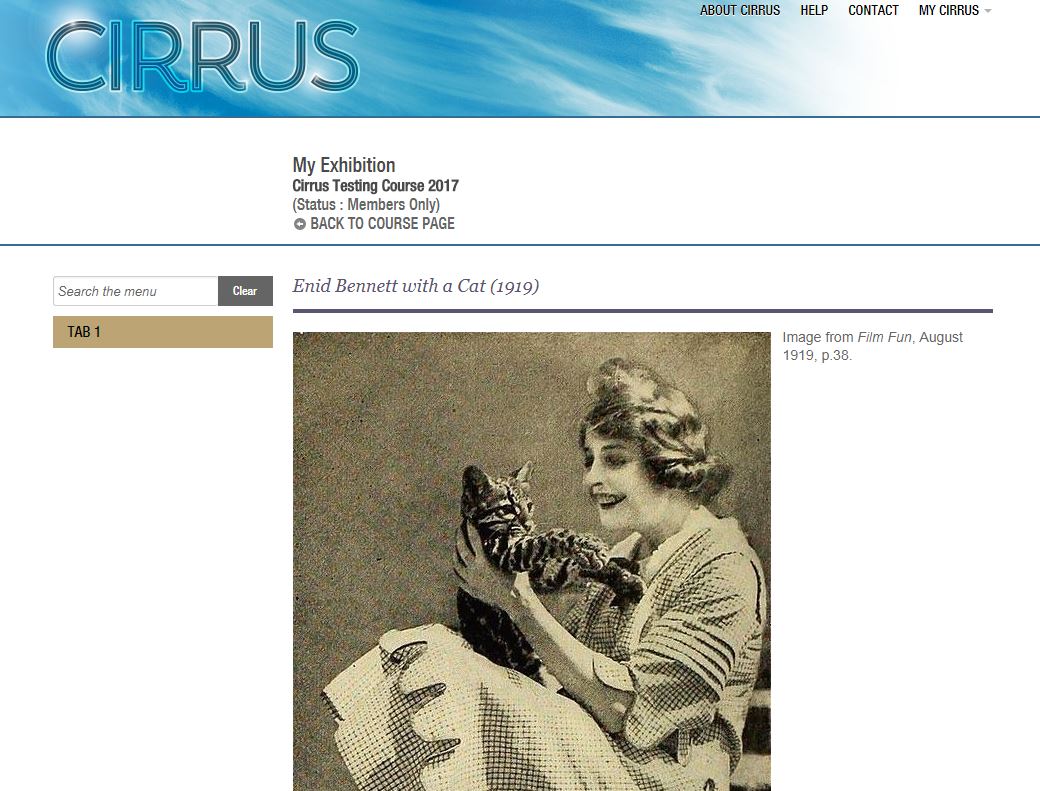
Click 'Save changes' and the image will be uploaded to your exhibition.
-
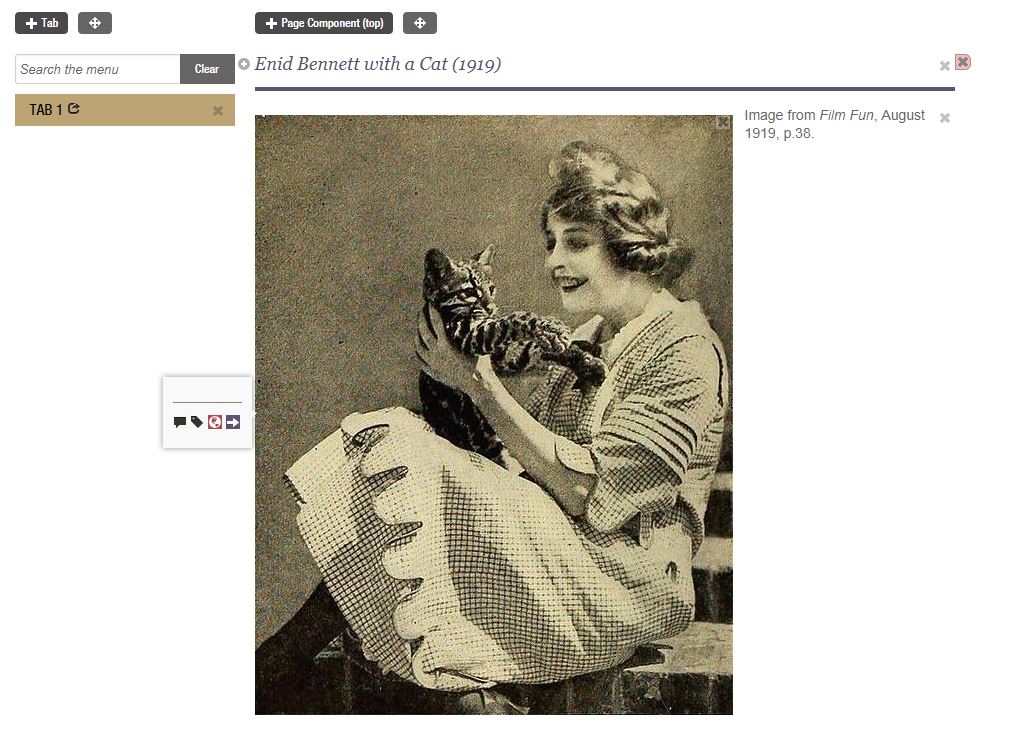
From left to right, the buttons allow you to:
- edit the image caption
- edit the image source
- edit the image URL
- change the image alignment (from left side of the screen to right, from right to centred, or from centred to left aligned)
To re-size your image, place the exhibition in editing mode. Use the cursor (which will now appear as a double-sided arrow) to drag the image to your preferred size.
-
You can add gifs to an exhibition, using the same process with which you added images.
Save the gif as a .GIF image (on your desktop or USB, etc.).
Click+ Page Component, and select 'New Page Component'.
Follow the steps for Adding an Image:
- Add a title and / or text.
- Click 'Save changes'.
- Click the image icon.
- Browse to find your gif.
- Add any necessary captions, URLs, and other information.
- Click 'Save changes'.
-
Adding audio-visual material is an excellent way of making your exhibition interactive and engaging. Follow the instructions below to include various types of audio-visual material in your exhibition.
-
Video and audio are both added to your exhibition using the 'Embed' option.
Note: you can create your own video material (e.g., short films) for inclusion in your exhibition, but they must be uploaded to a video-hosting service such as YouTube or Vimeo before they can be embedded in the exhibition.
-
YouTube Videos
For this example, we are using a YouTube video.
To embed the video in your exhibition, begin by clicking the + Page Component button.
Select the 'Embed' option from the pop-up window:
-
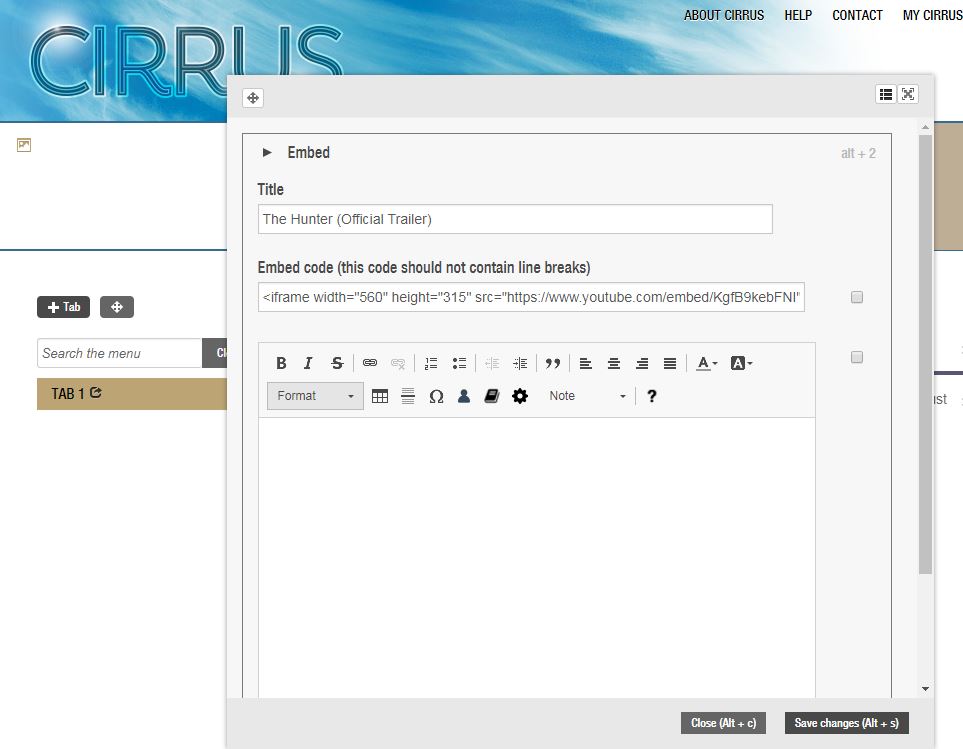
The pop-up box will prompt you for three items: title, embed code, and URL.
Title and text may help your reader to navigate your exhibition or can be used to provide important information.
The embed code section is where we put the link for embedding the video. To properly embed the video, make sure that you select the correct link.
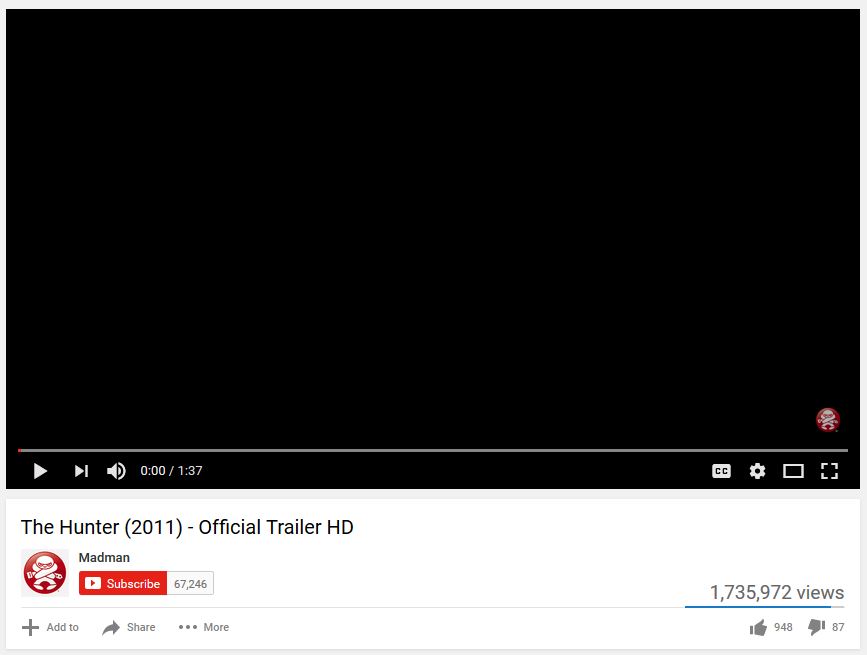
On the YouTube page, click the 'Share' button below the video:
-
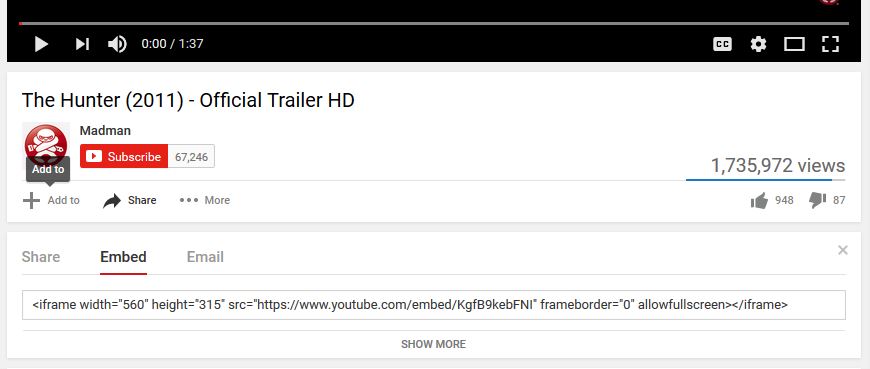
The Share button will open the options 'Share', 'Embed', and 'Email'. Click on 'Embed', which will bring up the URL we need:
-
Select the entire URL, which should begin and end with iframe tags, and paste it into the embed code section of the pop-up window.
When your pop-up window looks like the image below, click 'Save'.
-
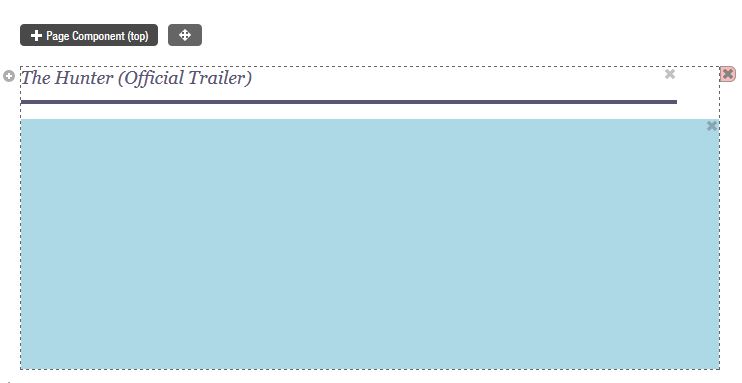
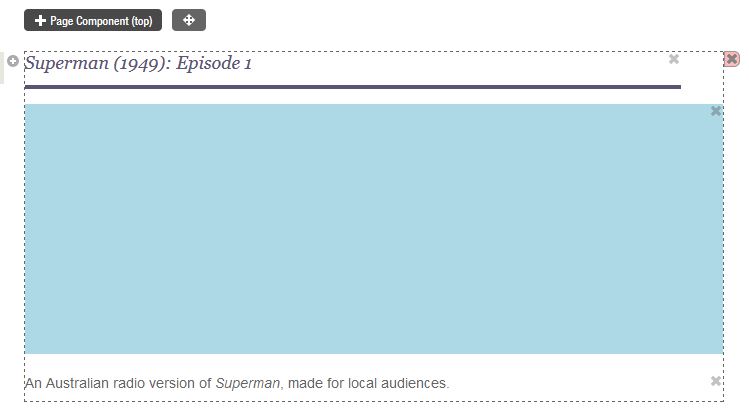
In editing mode, the embedded video will show up as blank blue box:
-
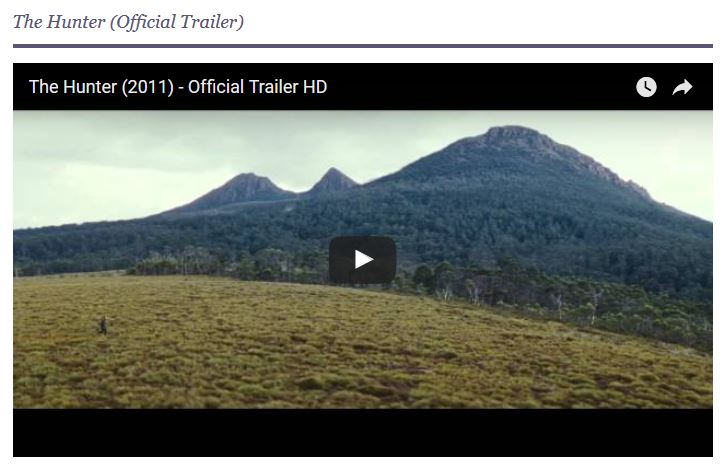
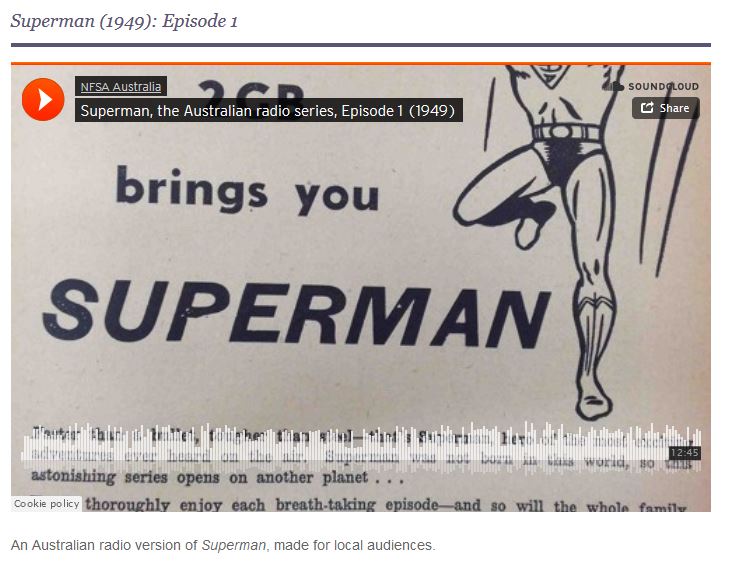
But in public mode, you should see the video embedded in your exhibition:
-
Note on using material from YouTube: In line with your responsibilities as a researcher, you will need to be cautious about which materials you use from YouTube in your exhibition. Not everyone on YouTube has the rights to reproduce the material that they upload. In addition to being a copyright violation, using such material also runs the risk of damaging your exhibition post-publication, if the videos are removed from the YouTube site for breaching copyright. For these reasons, we encourage you to be cautious and thoughtful in the way in which you use YouTube videos. For example, you will notice in the above images that we are linking to the official film trailer via the distributor's official YouTube channel: this makes the video both legitimate and stable.
-
While we have used an example from YouTube, we can embed videos from any site that offers an embed option.
Other sites that may provide useful resources for your exhibition include Vimeo and the Internet Archive.
Vimeo is a video-sharing social platform. While there are exceptions, Vimeo is primarily used by creators as a place to upload their own work (as opposed to YouTube, where users often upload third-party content). This makes it an excellent resource for, among other things, independent film and television.
The Internet Archive is an open-access archive of textual and audio-visual material, particularly out-of-copyright works. This makes it an excellent resource for, among other things, early film and television.
To embed content from these or any other services, locate the 'Share' button on the chosen video, then follow the same instructions as for YouTube videos above. Always ensure that you use the embed link, which contains the necessary code for embedding the video.
Note: Only embed videos in your exhibition if the host website allows them to be shared in this way. For example, the National Film and Sound Archive makes some of its videos available online, but does not permit them to be embedded in other sites. As a researcher, your responsibility is to ensure that you only use accessible, available materials.
If you cannot embed the video material, you can link out to the external website. But since you want to keep your reader focused on your exhibition, rather than exploring other websites, we encourage embedding material where possible.
-
Embedding audio-material in the exhibitions follows the same pattern as embedding videos: if the service has an option for embedding their material in external sites, then we can embed them in the exhibitions.
Example: SoundCloud
Soundcloud is an excellent resource for a variety of audio materials, including content from the National Film and Sound Archive.
To embed content from SoundCloud (or any similar service), we follow the same process as embedding non-YouTube videos:
- Click + Page Component, and select 'Embed' from the pop-up window.
- locate the 'embed' URL (on SoundCloud, it is under the 'Share' option).
- copy the entire URL (which should begin and end with iframe tags).
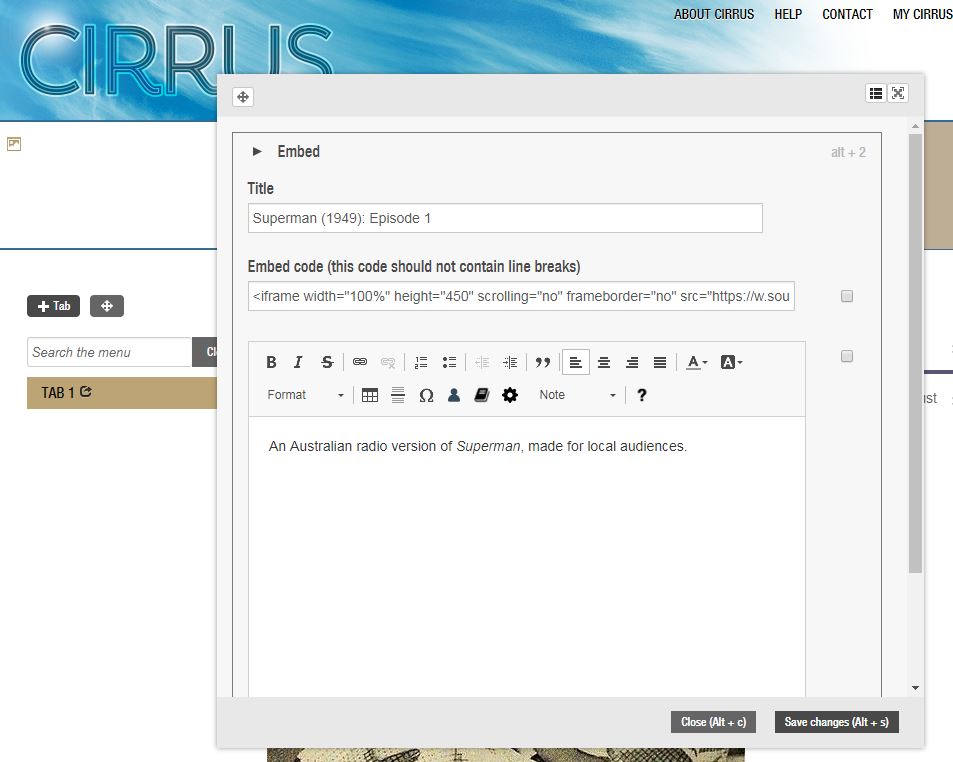
- paste it into the 'embed code' section of the pop-up box.
-
When you click 'Save', the audio material will be embedded in your exhibition. Like the video, it will appear in editing mode as a blue box:
-
In public mode, you should see the material embedded in your exhibition:
-
If you cannot embed the audio material, you can link out to the external website. But since you want to keep your reader focused on your exhibition, rather than exploring other websites, we encourage embedding material where possible.
-
Maps are a way of embedding interactive content in your exhibition. Using a pre-determined world map, you can flag specific locations that are relevant to your exhibition.
To embed a map, click on + Page Component, and open the Map tab.
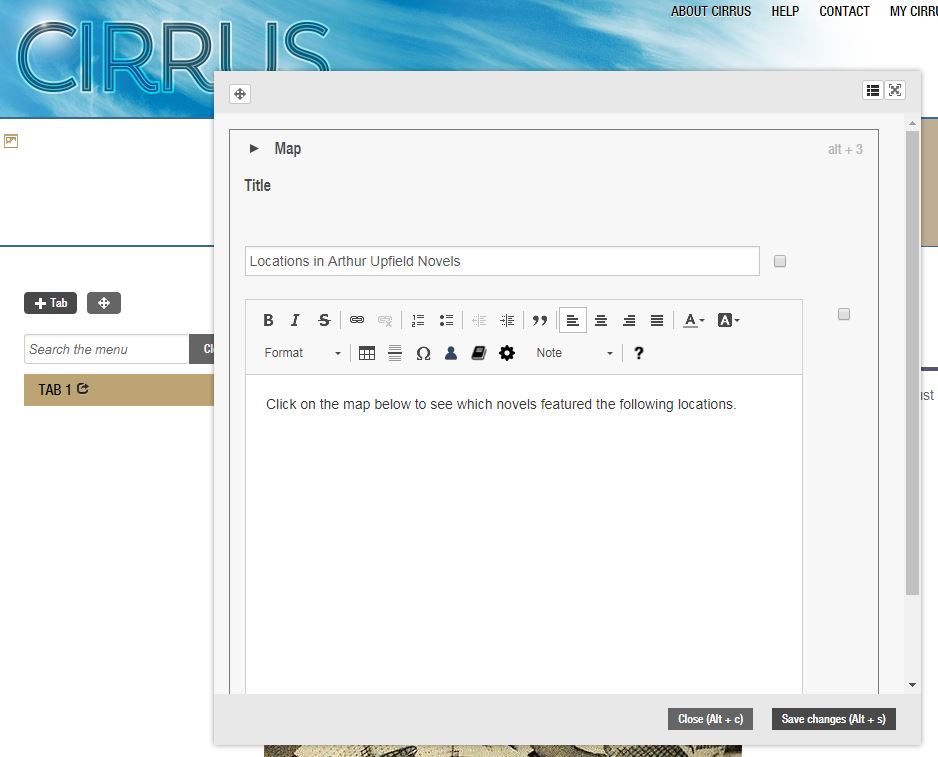
You will be prompted to add a title and text:
-
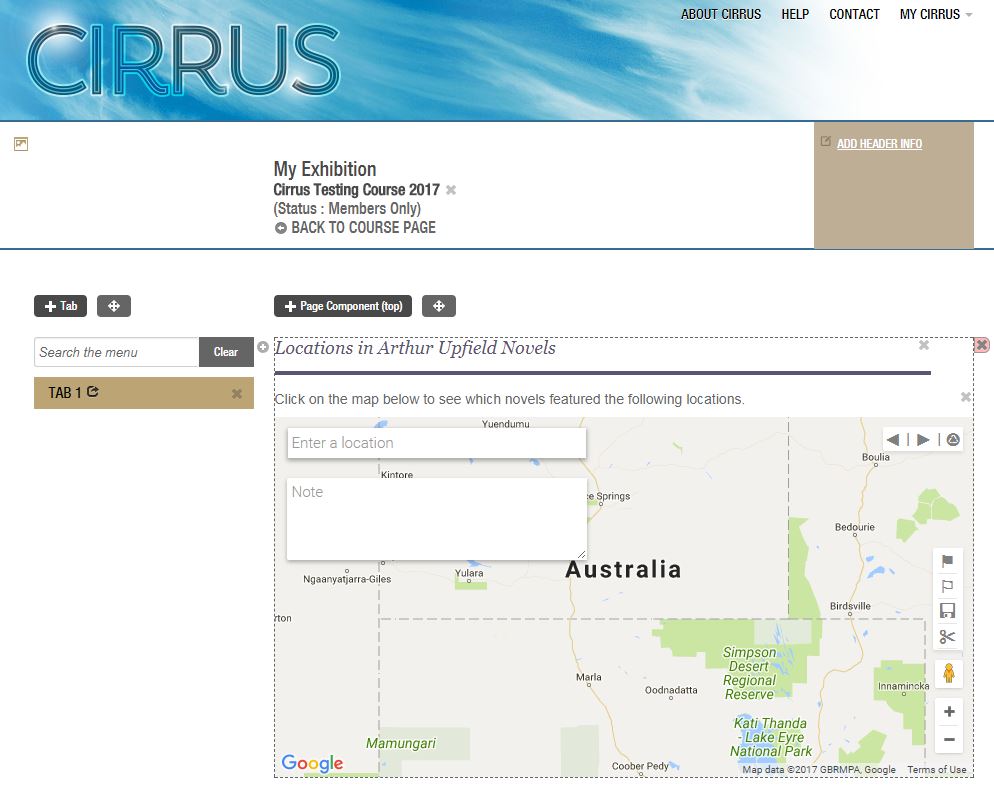
Click 'Save changes', and the blank map will be added to your exhibition:
-
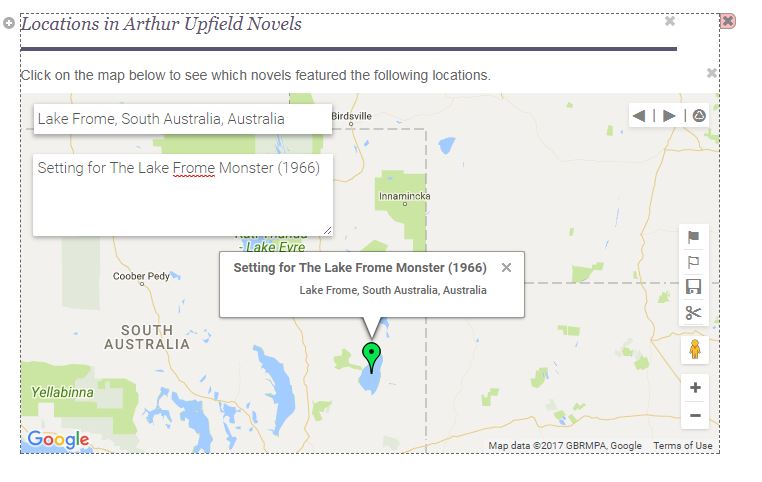
You will populate your map using the location and note field to the top left of the map.
Type a location into the location field, and choose the correct option from the drop-down menu. Use the note field to explain the significance of this location. Save the location to the map using the floppy disc icon to the right of the map.
-
Continue adding as many markers as necessary. The map is saved as each marker is added, so you can view it in public mode at any stage.
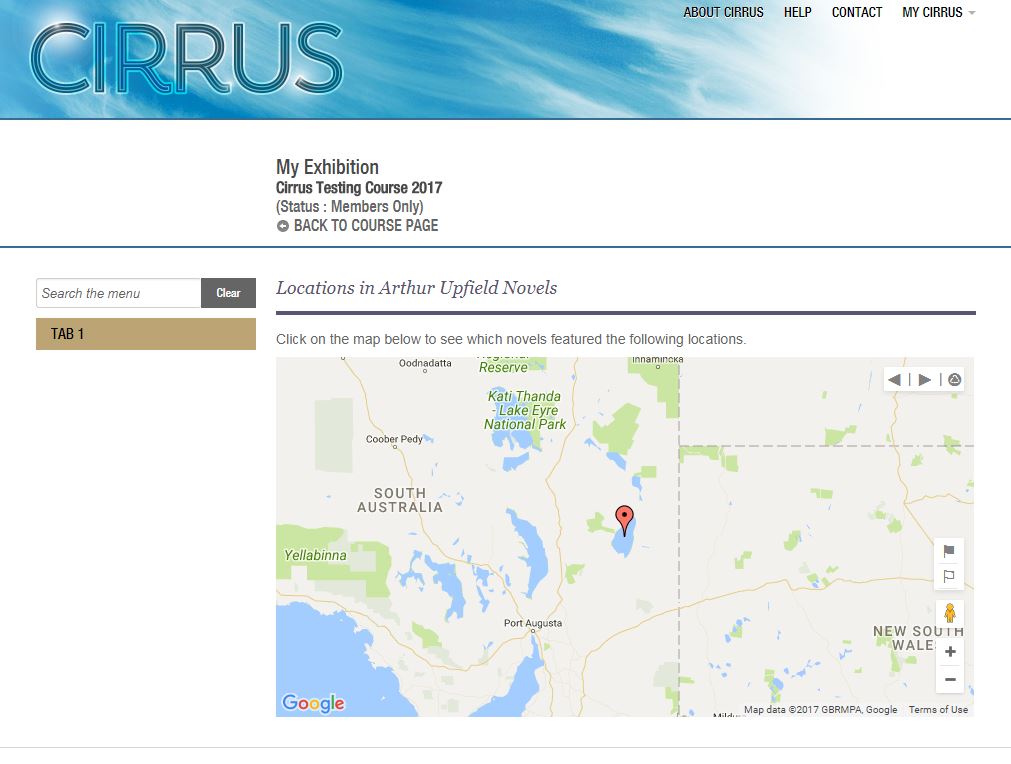
In public mode, the map looks like this:
-
To view the specific notes that you added for each location, click on the markers. You can open as many markers as you wish.
Note: When you add a map, the blank map defaults to Australia. However, you can map locations all over the world. Simply type the location you wish to add, and it will be added to the map.
-
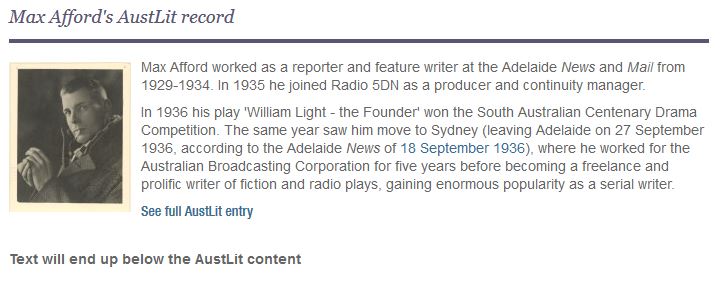
Agent and Work Features draw on content from the AustLit database, creating a direct link between your exhibition and relevant AustLit records. When you uses these options, you will create a hyperlink between your exhibition and the chosen AustLit record/records, as well as drawing some AustLit content over to form part of your work. As such, they only work on works or people that are listed in AustLit. Whether or not this is applicable to you will depend on the topic of your exhibition.
Note: 'Agent' is the general term that AustLit uses for any body involved in the production of texts. So 'agent' applies to authors, but also to publishing houses, printers, theatre companies, and so on.
If you wish to add Agent and Work Features, you have the following options:
- Agent Feature / Work Feature
- Four Author Block / Four Work Block
-
To add an Agent or Work Feature, begin by clicking the + Page Component button.
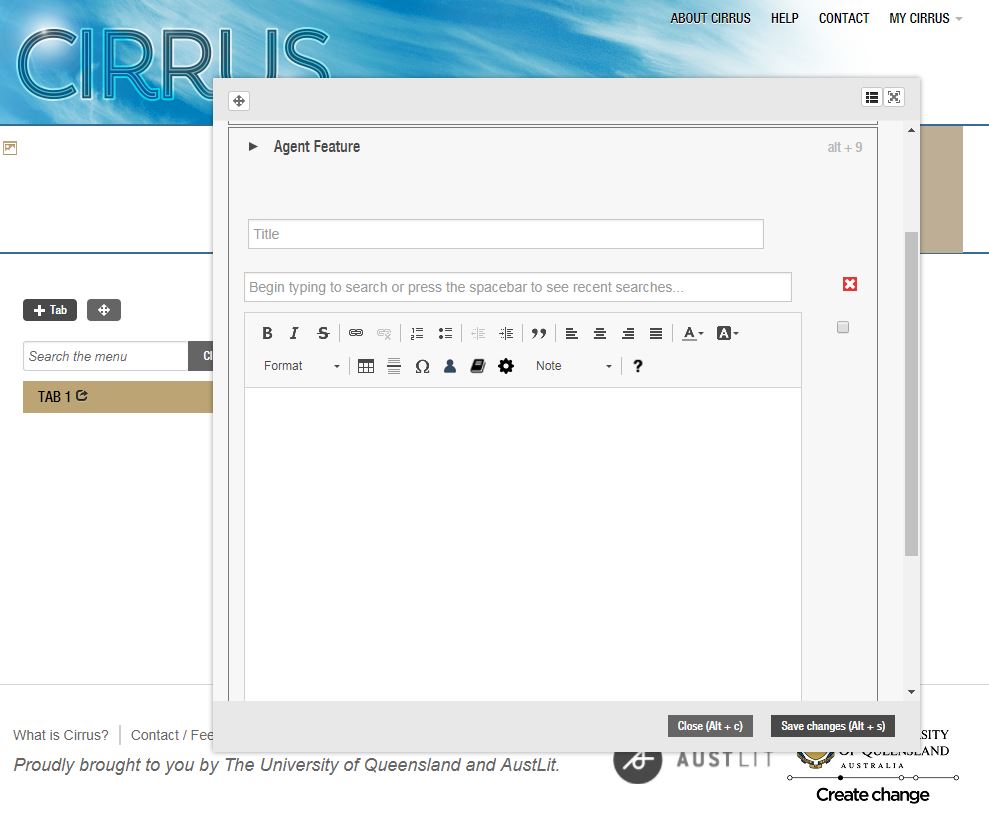
From the pop-up window, select the relevant option. In the image below, we have selected an Agent Feature:
-
You will be prompted for a title, which is not required, but can be useful for your reader. You will also be prompted to search for the chosen agent / work in AustLit: select the record that you are looking for, and the field should turn green.
Note: make sure that you spell the author's name or work's title correctly, or the search will not find it as easily.
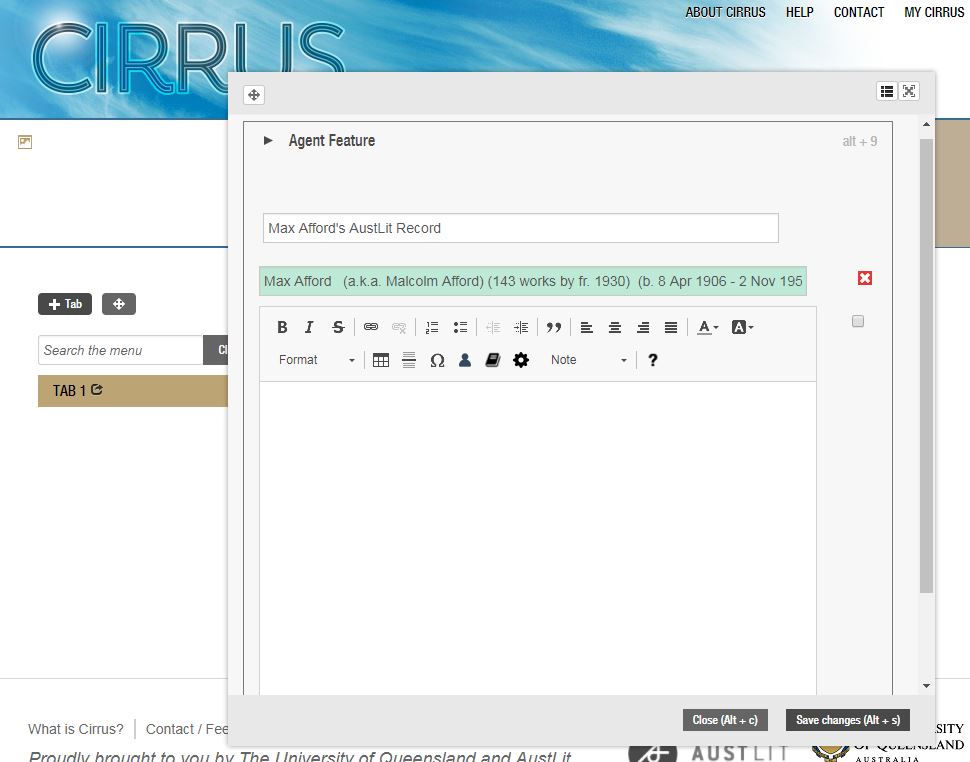
Below, we have created a title and selected an author.
-
You do not have to add additional text here. If you do, it will appear below the text that is drawn across from the AustLit record, as you can see in the image below:
-
The Agent / Work Feature is a useful way for you to draw on biographical, organisational, and bibliographical material that already exists on the AustLit database, rather than needing to reproduce and replicate the material yourself.
-
These components work in a similar fashion to the Agent Feature / Work Feature, in that they draw across content from the AustLit database. But the amount of content and the presentation are quite different. Where the Agent /Work Feature draws across a paragraph of text, the blocks draw across a title/name and image, which they position in a single box.
To add a Four Author Block or a Four Work Block, begin by clicking the + Page Component button.
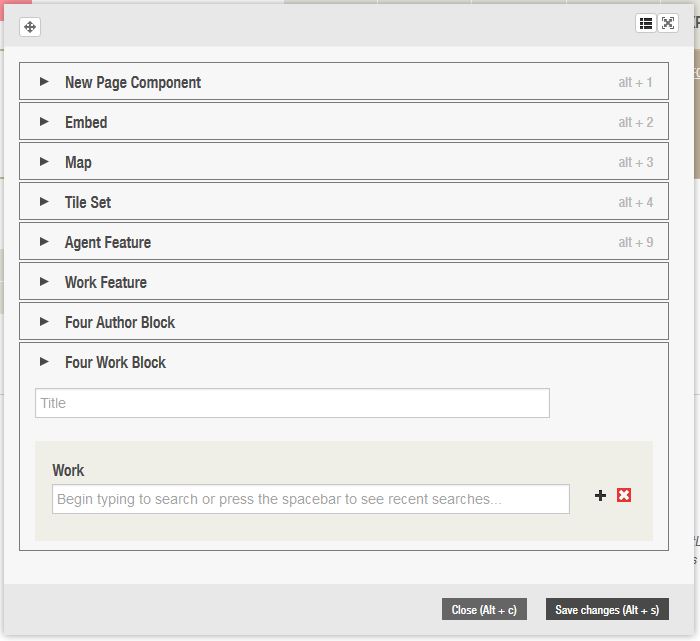
Select the option you wish to add from the pop-up window. In the image below, we have selected a Four Work Block. You will be prompted for a title, which is optional. You will then be able to add your chosen works (up to four):
-
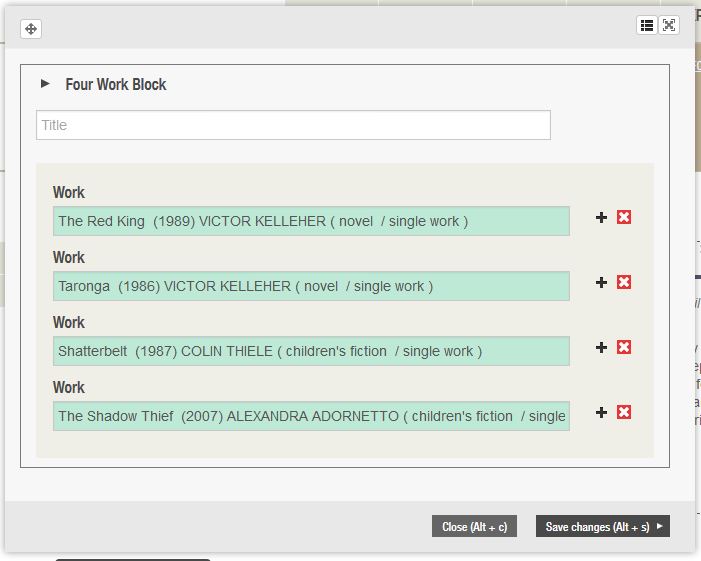
Select the chosen works by typing the name into the 'Work' box, and choosing the correct work from the drop-down menu. Add new boxes (up to four) by using the plus sign to the right of the box.
The boxes will appear green when you have chosen the work:
-
Once you have selected your works or authors, click 'Save'.
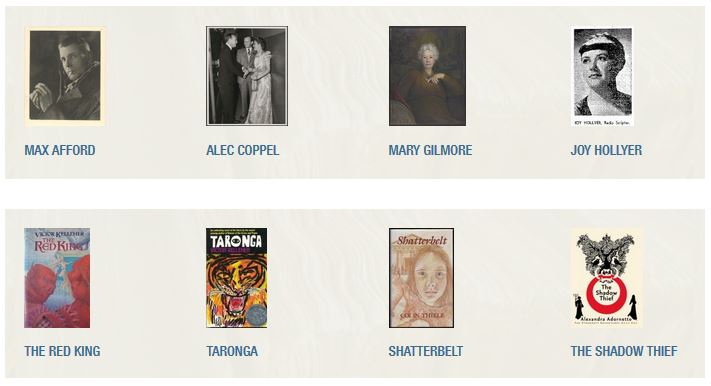
Below are examples of what the Four Author and Four Work Blocks look like:
-
Unlike the Agent / Work Feature, these features don't include any text beyond the name / title, and pull the author's portrait or the work's cover page across from their AustLit record. More visual than the Agent / Work Feature, they are a useful way of breaking text and adding interest to exhibitions.
Note: If the AustLit record does not include a cover image, the blocks will look quite different. You can contact AustLit staff to see if they are able to add a cover image to the record.
-
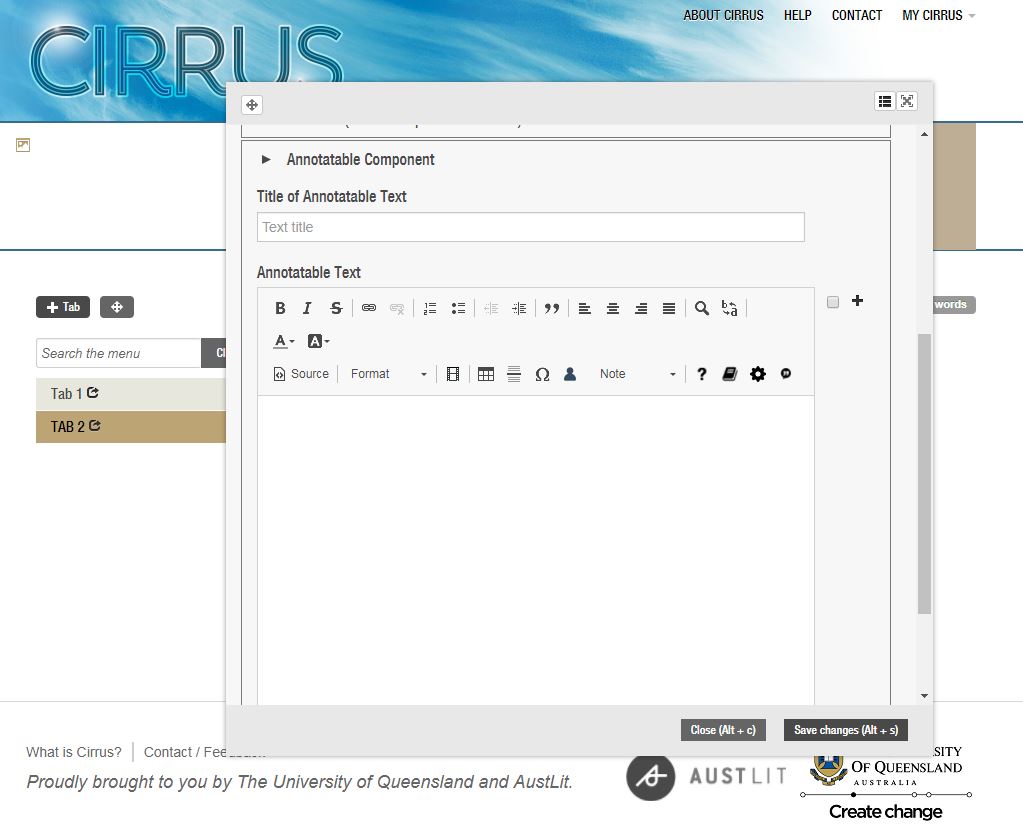
Then add the title for your annotatable object, and click 'Save Changes'.
Note: you do have the option to add text for annotation at this stage, but that can also be added in the next stage.
-
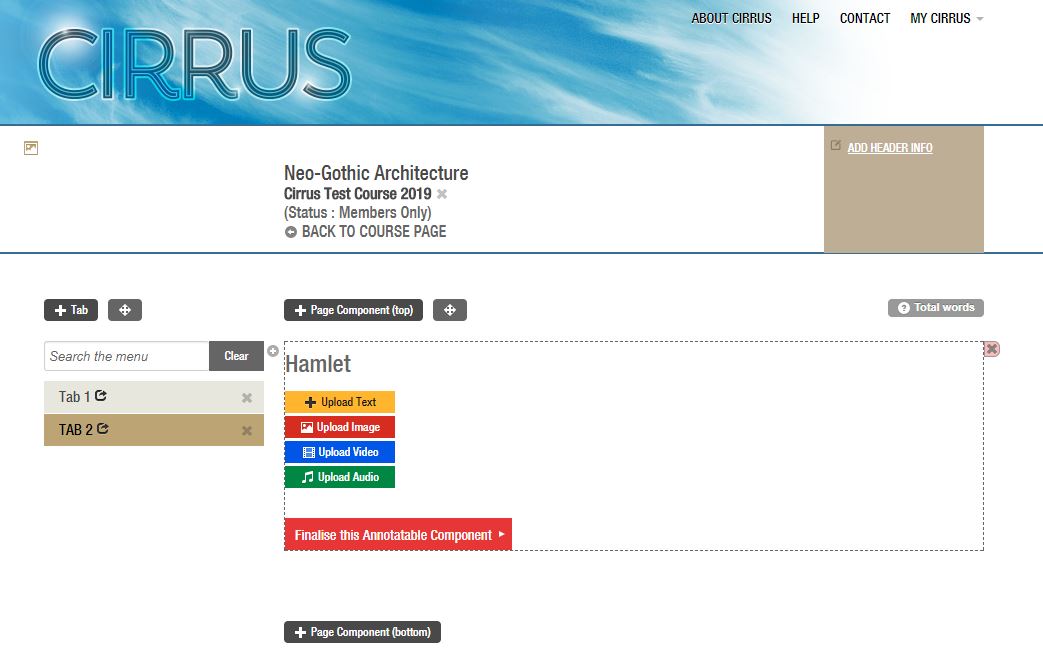
This will bring you to a screen that looks like the one below. Whether you're uploading text, image, audio, or video, it is all uploaded from this screen. For images, audio, and video, you will need to have them saved to a local directory: this is not the same process as embedding a video (instructions above).
Note: for audio and video files, the maximum upload size is 100MB. If your internet access is slow, you may notice some delays in uploading.
-
We're going to upload an image in this example.
Click on 'Upload Image', and you'll see the following screen. Browse for the file you wish to upload.
-
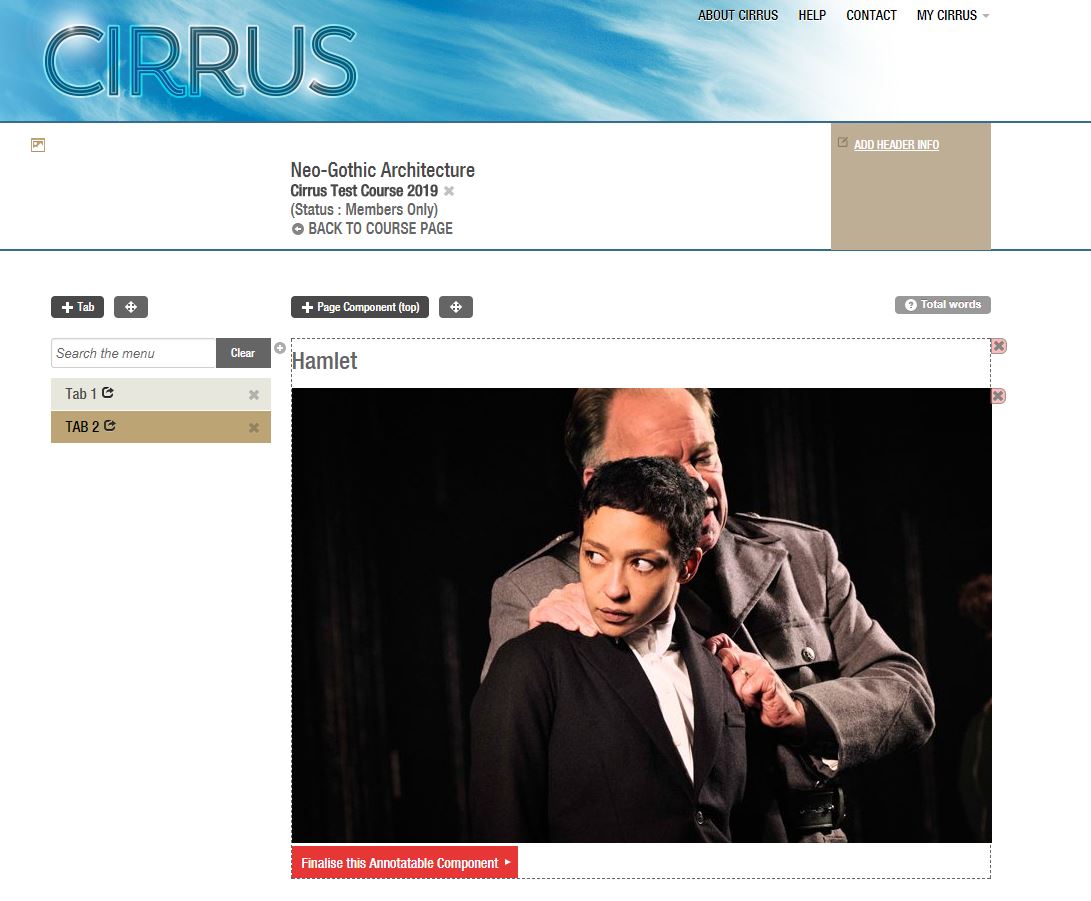
Click 'Save Changes', and your image will appear in the page, as below.
-
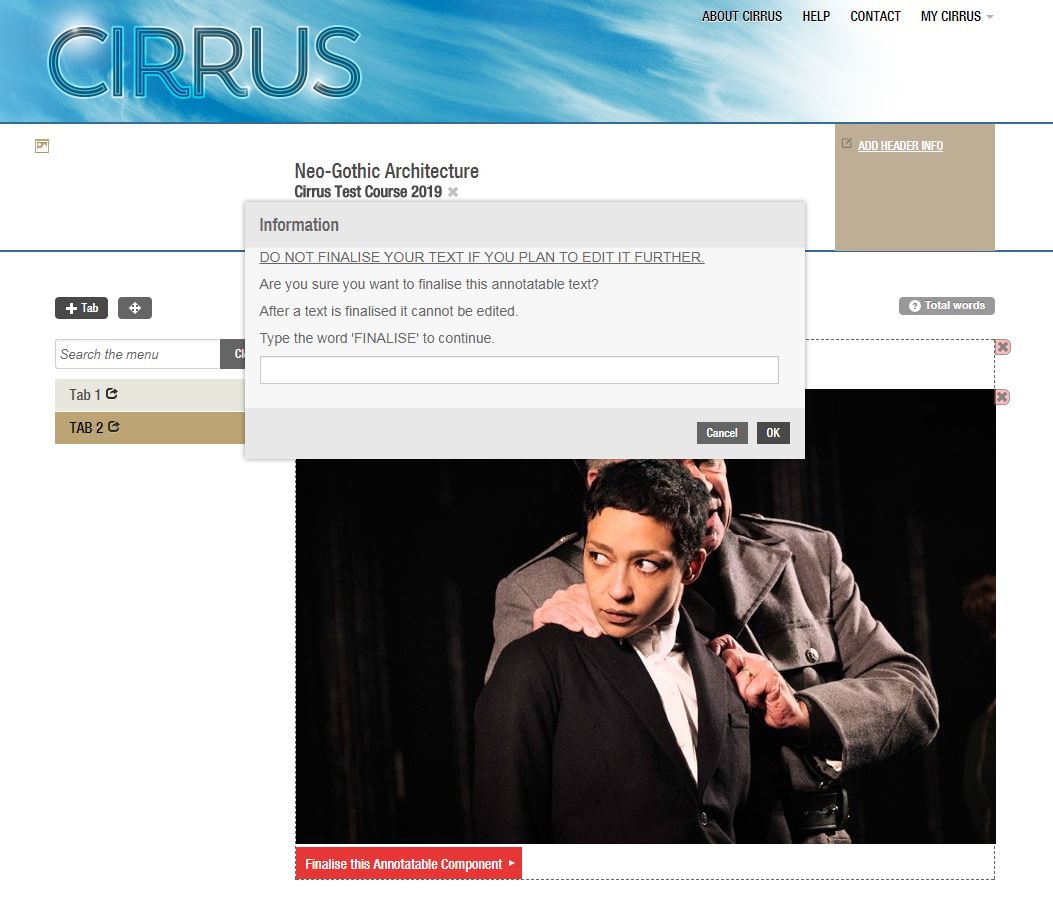
At the moment, the image is not annotatable. We need to finalise it first, using the 'Finalise this Annotatable Component' button.
Note: You cannot edit the component after it has been finalised. Make all the necessary changes to the component before you finalise it.
-
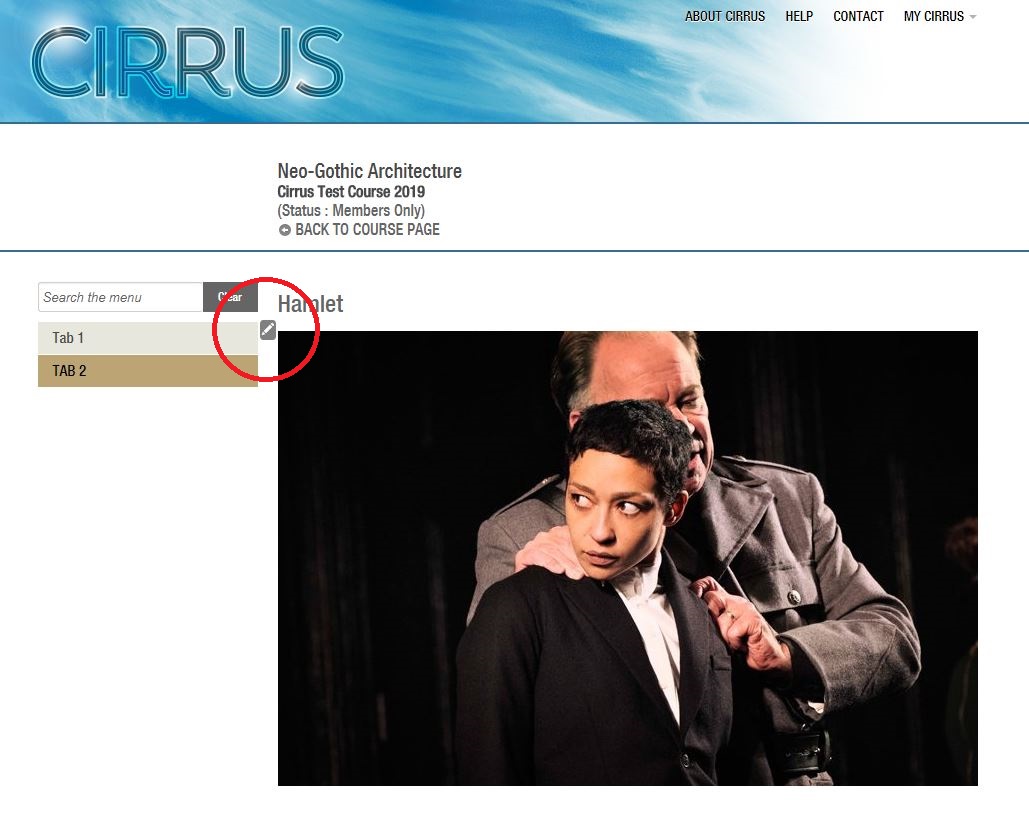
Once the component is finalised, you can annotate it by using the icon of a pen in the top left-hand corner.
-
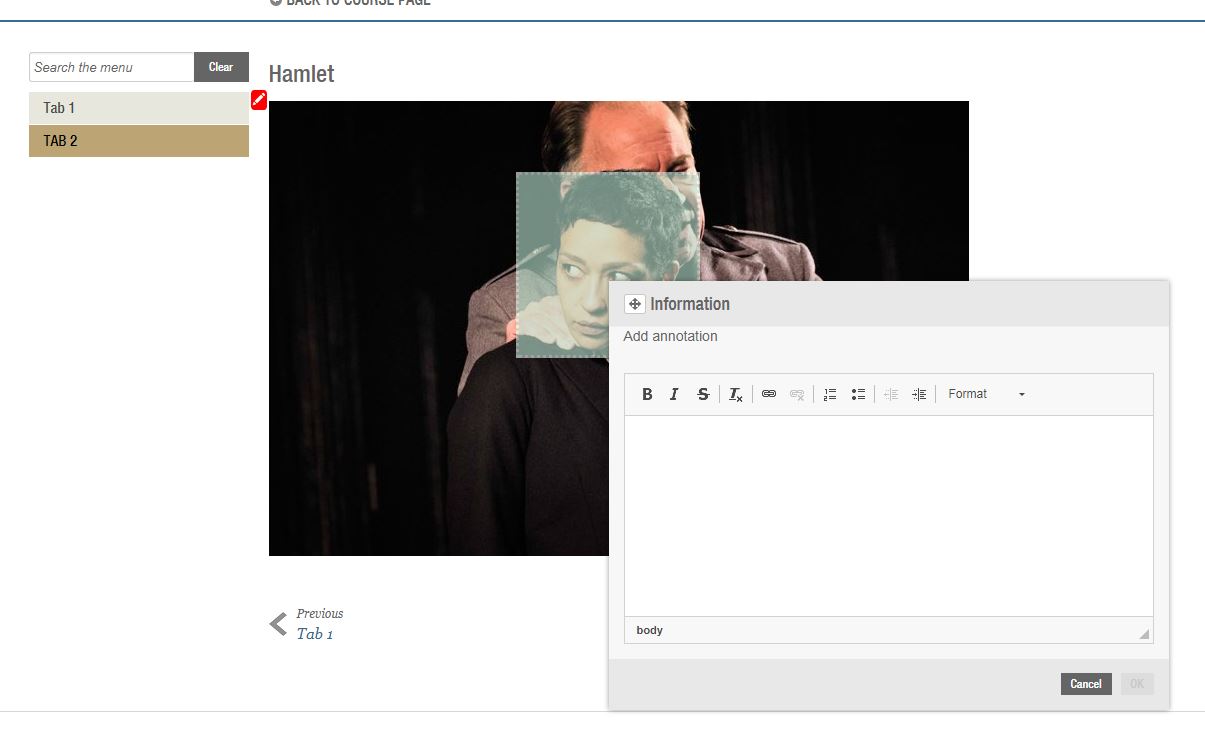
Select the section that you wish to annotate (by drawing a square around it in this instance; by selecting a line of text; or by clicking on a section of video or audio), and add your annotation to the pop-up text box.
-
Once you annotation is complete, click OK, and it will be saved.
You can edit your annotations at any time. For information on editing, deleting, and adding images to annotations, see this section of the manual.
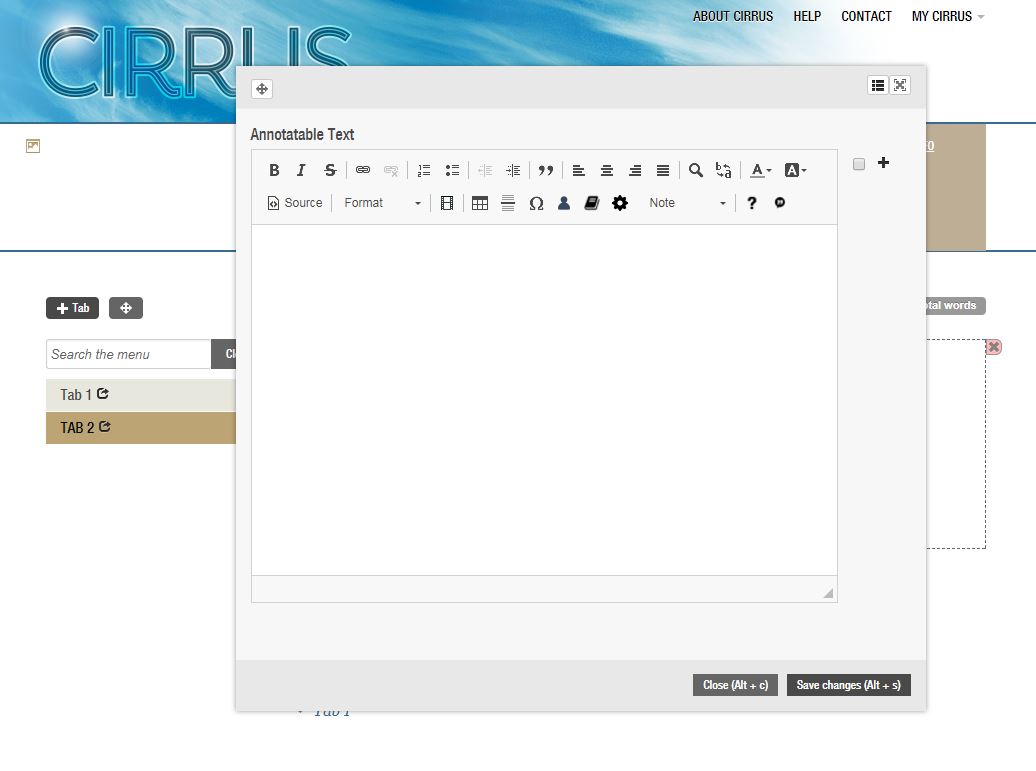
For text annotations, you will be shown a text-editing box instead of a browse button, as in the image below.
-
Type or paste your text into the box, and click OK. Follow the steps above to finalise and annotate the text.
You might be interested in...

